Looking for help?
Campaign 9 – Cheesy Steak Sandwich
Quick Reference
| Product | Receiving | Thaw Temp | Storage | Cook Time | Quality Serving | Once Opened/Prepped | Hold Time |
|---|---|---|---|---|---|---|---|
| Steak | Freezer | Freezer | 3 minutes | 150°F to 160°F | 2 hours | ||
| Cheese | Dry Storage | Dry Storage | 150°F – 160°F | 4 days | 2 days – once heated | ||
| Onions | Dry Storage | Whole Onions – Dry Storage – 6 inches off floor Prepped Onions – 34°F – 41°F Cooler or make table | Prepped – End of Day | ||||
| Hoagie Bun | Dry Storage | Room Temp | Dry Storage | 120°F | Toasted to order |
- Q.A. Standard: A fresh hot sandwich where you can taste every condiment in every bite.
Tools Needed
- Sharpie Marker
- Biscuit Splitter
- 2oz ladle
- Meat trowel
- Red handles spatula
- Squeeze bottle (liquid margarine)
- Measuring cup
- #24 disher
- 1 oz spoodle
- 4-1/6 size pans 6-inches deep
- 4-1/3 size pan 6 inches deep
- Mphc pan with solid lid
- 4-1/6 size pans 6-inches deep with slotted lids
Worksafe
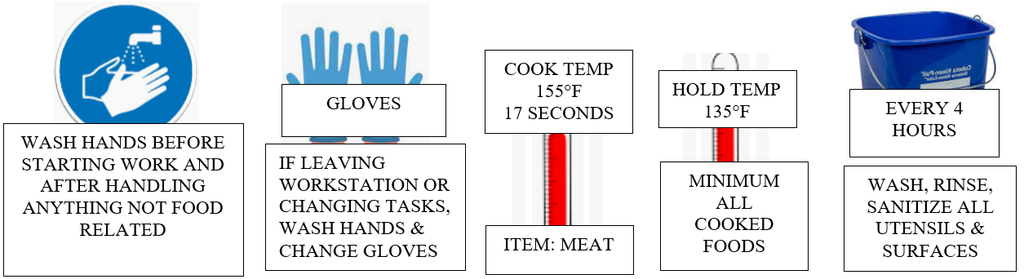
- Wash hands thoroughly after handling raw meat. Never handle other food products when handling raw meat as this will cause cross-contamination.
- To cut a sandwich in half, place biscuit splitter on top of sandwich and place free hand on top of blade to hold the sandwich together. Do not hold sandwich from side while cutting.
- Do not slam the door. Never operate the microwave without food inside. This could result in damage to the equipment and cause a fire.
Preparing and Holding Cheese Sauce (Microwave)
- Wipe off the top of the cheese sauce can with a sanitized towel. This will remove any foreign particles that could contaminate the cheese sauce.
- Open the can of cheese sauce using the can opener
- Empty the cheese sauce into a clear Cambro with lid
- Use a rubber spatula to remove all cheese sauce from the can
- Place the lid inside the can and discard
- The cheese sauce can be held in the Cambro for four days including the date poured unless it has been heated
- Write the discard date on a dissolvable label and place on the lid
- Example: Day poured + 3 additional days = Discard Date
- Poured on 30th + 31st, 1st, 2nd = Discard on the 2nd (EOD)
- Place no more than 1qt of cheese sauce into a Cambro container
- Place lid on the Cambro container, place into microwave and heat for 2:00 minutes.
- Remove and stir with a rubber spatula. Use a thermometer to check the temperature of the cheese sauce.
- Repeat process ensuring you are not heating for over 30 seconds at a time until product reaches an internal temperature of 165°F
- Once the cheese sauce has reached a temperature of 165°F, place heated cheese sauce into a lined 1/3 6-inch-deep pan with slotted lid.
- Once the cheese sauce is heated it will hold for 2 days including date heated if it doesn’t pass the original 4-day hold time
- Write the discard date on a dissolvable label and place it on the slotted lid.
- At close scoop all remaining cheese sauce that is in date into a clean Cambro from lined 1/3 6-inch-deep pan.
- All remaining cheese left in liner must be removed from liner using a long-handled spatula.
- Transfer dissolvable labels onto Cambro and place in walk in cooler.
- Example: Day heated + 1 additional day = Discard Date
- Heated on 30th + 31st = Discard on the 31st (EOD)
- At the EOD, if any remaining hold time is left, place the dissolvable label onto a Cambro container and place into the walk-in cooler set to maintain a temperature of 34°F – 41°F
Preparing Sauteed Diced Onions
- Always use a clean pan for new products – Do not mix old with new
- Communicate with the backline coordinator for how much product to cook
- Ensure the grill has been scraped thoroughly
- Squeeze approximately 1 oz of liquid margarine onto a clean section of the grill
- Portion the diced onions onto the margarine
- Using the red perforated spatula spread out the diced onions
- Holding the seasoning dredge in the palm of your hand, tilted up, apply a light amount of seasoning to the diced onions by shaking the dredge side to side while moving from back to front
- Place a domed lid over the diced onions
- Press the 2 ½ -minute hamburger timer
- Use spatula, turn the diced onions after 1 minute 15 second duty timer sounds
- Cover onions and continue cooking an additional 1 minute & 15 seconds
- When the final timer sounds, turn the diced onions again
- When the sautéed diced onions have finished cooking, transfer to a clean MPHC pan
- Bring a clean MPHC pan to the grill to prevent sautéed diced onions from being dropped on the floor
- Never add new sautéed diced onions to old sautéed diced onions in the MPHC pan
- Place the MPHC pan into the sautéed diced onion slot programmed for 60 minutes
- No lid (hs2) or slotted lid above the sautéed diced onions
Cooking Steak
- Communicate with the Backline Coordinator for the number of shaved steak portions to cook
- Always wear Food-Mitt gloves when handling frozen steak portions.
- Using Food-Mitt gloves, remove the projected number of shaved steak portions from the freezer.
- Place shaved steak portions directly onto the preheated grill (cook no more than 8 portions at one time).
- Remove Food-Mitt gloves by shaking them off into a trash can. Do not touch the outside of the gloves.
- Immediately start the 3-minute timer.
- Season the steak evenly by shaking the dredge side-to-side while moving from back to front.
- When the timer reaches 1 minute 30 seconds, use the meat trowel to turn each portion.
- Use the meat trowel to begin breaking apart and chopping the steak while turning
- Use caution to prevent grease from splashing
- Allow steak to continue cooking.
- When the timer sounds, use the red handled perforated spatula to fully break apart and chop the steak, ensuring no large pieces remain.
- Check the steak for doneness:
- No pink color remains
- Juices run clear
- Once fully cooked, transfer the steak into a warming pan.
- Using a 2oz ladle add 3 scoops of cheese sauce to the shredded steak.
- Stir steak and cheese with the #24 disher.
- Place into mphc for 2 hours.
Batches of Cheesy Steak
- Single batch: 4 steak pucks to 6 ounces of cheese sauce = 6 regular sandwiches
- Double batch: 8 steak pucks to 12 ounces of cheese = 12 regular sandwiches
Cheesy Steak Sandwich Assembly
- Prepared to order
- Place hoagie bun in toaster cut side up
- For sandwich only: pull down foil wrap
- For Cheesy Steak sandwich and fries: place on a 9inch plate (dine in)/hinge container (dine out)
- Place toasted hoagie bun on a 9-inch plate or hinge container
- Always wear single-use gloves when preparing sandwiches
- Use #24 disher to place two scoops of shredded steak cheese mix on the heel
- Portion 1 oz. of sautéed onions on the top of the steak using perforated spoodle. Use back of spoodle to spread around
- Place crown on dressed heel
- For sandwich only: wrap as special mark CS
- For Cheesy Steak sandwich and fries: place in display
Serving
- Cheesy Steak only Dine in: Place on serving tray
- Cheesy Steak only Dine out: Place in 6lb bag with 2 napkins
- Cheesy Steak with fry Dine in: Place sandwich(es) on serving tray & one order regular fry
- Cheesy Steak with fry Dine out: Place sandwich(es) in hinge containers with fries with 2 napkins in a t-shirt bag.
Assembly Cheesy Steak Fries
Dine in order – Lined 3 lb. food tray on a lined serving tray
Dine out order – Large Hinged Container in T-shirt bag
- Always wear single-use gloves when handling ready-to-eat foods
- Pull down the correct container
- Portion a large fry into the container
- Using #24 disher scoop one serving of cheesy steak mix onto the large order of fries.
- Ensure cheesy steak is evenly distributed over large fry.
- Use 2 oz ladle to apply cheese sauce evenly across the fries
- Place onto a lined tray or in a T-shirt bag
- Serve with a fork and 2 napkins