Looking for help?
Blueberry Biscuits
Quick Reference
| Product | Receiving | Storage | Cook Temp | Cook Time | Reheat Time | Hold Time | Quality Serving | Specifications |
|---|---|---|---|---|---|---|---|---|
| Blueberry Nuggets | Frozen | Freezer 0°F Or Below | ||||||
| Biscuits | Dry Storage | Dry Storage | 375°F | 10 Minutes | 4 Minutes | 30 Minutes Display Cabinet, Biscuit Warmer & Working Pans. Expires End Of Day Biscuit Back | 120°F | Weight: 2 1/4 To 2 1/2 OZ. Size: 3 1/2″ Diameter X 1 1/2″ Height |
| Flour | Dry Storage | Dry Storage | ||||||
| Buttermilk | Cooler | Cooler 34°F – 41°F | ||||||
| Icing | Room Temp | Room Temp |
KEY NOTES: Always follow QA Standards. Monitor temps, rotate product, and discard any product that exceeds the hold time.
Tools Needed
- Electric Mixer with bowl & hook
- 64-ounce measuring cup
- 6-inch-wide table scraper
- Biscuit pan liners
- Rolling pin with 1/2 inch height gauge
- 1/2″ rubber spatula
- Pan holder
- Sifter
- Hanging oven thermometer
QA Standards
- Fresh Blueberry Flavor
- Golden Brown Biscuit
- Flaky Biscuit
- Fully Cooked
Worksafe
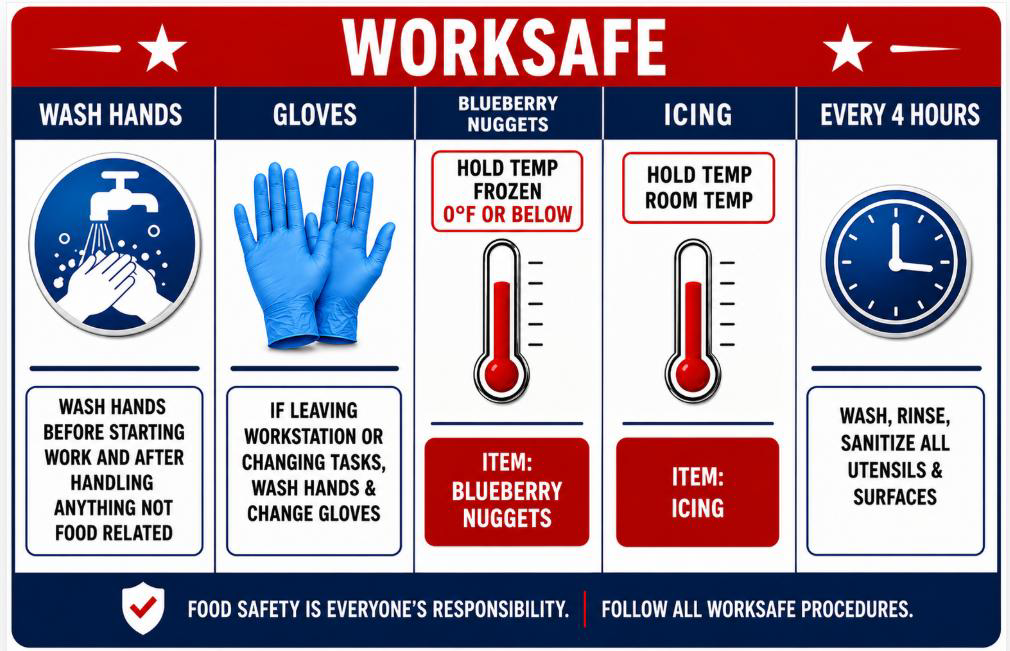
Receiving & Storing
- Blueberry nuggets are received frozen and stored in the walk-in freezer at 0°F +/- 10°F.
- Do not thaw blueberry nuggets prior to mixing.
- Return unused blueberry nuggets to the freezer immediately after portioning.
Mixer Set Up


- Turn mixer on
- Ensure speed is to set to 1 – if not, adjust to 1
- Ensure timer is set to 1:30 – If not adjust to 1:30
- Place bowl onto mixer
Mixing
- Single Batch: Add 32 oz buttermilk, 1 bag biscuit mix, and 2 cups frozen blueberry nuggets. Mix using standard biscuit procedures.
- Double Batch: Add 64 oz buttermilk, 2 bags biscuit mix, and 4 cups frozen blueberry nuggets. Mix using standard biscuit procedures.
Rolling
- Using the sifter, heavily dust an area on the biscuit table with self-rising flour. The area should be slightly larger than the biscuit bowl. (Length of rolling pin)
- First batch of the day – Place approximately 1/4 of the dough from the mixing bowl onto the center of the floured area.
- Scrape the sides and edges of the mixing bowl using a rubber spatula or scraper which will reduce build up in the bowl
- ON THE FIRST BATCH OF THE DAY, SIFT A HEAVY LAYER OF SELF-RISING FLOUR ON TOP OF THE DOUGH
- Gently press the dough down with your palms using overlapping hands until it is about 1 inch high
- Fold the left side into the middle
- Fold the right side into the middle
- Fold the top down to the middle
- Roll the top down to the bottom
- Gently pick up and hold the dough with one hand while smoothing out the floured area on the biscuit table with your fingertips
- It may be necessary to re-flour the work area to prevent the dough from sticking to the table until a base is built up
- Place folded ball of dough back onto the center of the floured area
- ANYTIME THERE IS NO REWORK IN THE DOUGH, REPEAT THE FOLDING STEPS
- Gently press the dough down with your palms using overlapping hands until it is about 1 inch high
- Before rolling, dust the rolling pin with flour away from dough
- Hold the rolling pin with your palms up. This will prevent you from pressing down too hard on the dough.
- Begin rolling the dough starting in the middle. Roll to the top and then to the bottom. Always roll to the end of the dough before changing directions.
- Continue to roll in a forward and backward motion until the dough is level and 1 1/2 inch thick. (This should take 6 – 8 complete passes.)
- If dough begins to build up in front of the pin, you are applying too much pressure. STOP! Lift the rolling pin, go to the end of the dough, and begin rolling in the opposite direction.
Panning
- Make sure pans are cool before placing biscuits on them
- Placing biscuits on warm pans will cause them to start rising before you are ready
- Place a pan liner on the biscuit pan
- Flour the tips of your fingers on both hands
- Using floured fingertips, walk your fingers under the biscuit
- Pick blueberry biscuits up from the table two at a time using both hands
- Be careful not to indent top or misshape biscuit
- If a blueberry biscuit sticks to the table, use biscuit scraper to lift it only if it can be removed without misshaping it. This is caused by dough being too wet or not spreading out flour thoroughly over work area.
- Begin placing blueberry biscuits on a lined pan filling the middle row first top to bottom. This will ensure correct spacing so biscuits will only have to be handled once.
- Fill in outside rows last
- When pan is full you should have 15 biscuits on the pan
- ANY BLUEBERRY BISCUIT THAT IS MISSHAPEN, INDENTED, OR THE TOP IS NOT SMOOTH SHOULD BE CULLED AND PLACED INTO THE RE-WORK PILE
Using Re-work Dough
- Take the re-work dough from the previous batch and place it into the center of the next batch of fresh dough. Do not make re-work into a ball, this will cause re-work to become tough, and biscuits will be heavy.
- Gently press the re-work dough into the fresh. Press with your palms using overlapping hands as before until the dough is 1 inch high.
- Follow the procedures for rolling, cutting, and panning
- You should never have more re-work dough than fresh
Cooking
- Blueberry Biscuits should be cooked as soon as the pan / pans are full. This will prevent dough from rising too soon.
- Biscuit ovens should have three racks
- If only one pan is loaded, place it on the center rack
- If loading two pans, place one on the top rack and one on the bottom
- Check oven temperature
- Each oven should have an oven thermometer hanging from the top rack.
- When the red light goes out on the oven, check the thermometer. The temperature should be 375°.
- Do not load biscuits in the oven unless the red light is out, and oven is up to the correct temperature
- Rotate cooking of biscuits from oven to oven so that recovery time is minimized
- When the oven is at the correct temperature, open door and load pans
- Place pans toward the rear of the oven
- Close the door and set timer for 10 minutes for cooking
- Do not open oven doors while biscuits are cooking
- When timer sounds, look through the glass door and make sure biscuits are golden brown in color (See Biscuit Chart)
- If biscuits are not the proper color, set timer for one minute until correct color is reached
- When timer sounds, open door and bring one pan out onto table. Close door. Check the tallest blueberry biscuit for doneness by lifting the top off and making sure it is fully cooked inside.
- If not done, place back in oven for one minute
- If biscuits are done, remove from oven using pan holder. Close oven door immediately so oven will recover to proper temperature quickly.
- DO NOT BUTTER THE BLUEBERRY BISCUITS
Icing
- Do not butter blueberry biscuits.
- Allow blueberry biscuits to cool for 30 minutes on the biscuit rack
- Cut corner of icing bag
- Apply 1 oz icing to each blueberry biscuit in a zig-zag pattern.
- DO NOT spread the icing around
- Any remaining icing in the bag, placed in a covered Cambro
- Use a sharpie to mark a dissolvable label with a 2-day hold. Day opened plus 1 additional day.
Holding
- Breakfast Hours: Place on Biscuit rack
- After Breakfast: Wrap blueberry biscuits loosely with plastic wrap
- Hold on biscuit rack until eod
Preparing
- Package iced blueberry biscuit (s) in a 3lb food tray on deli liner
- Place in microwave:
- 1 Iced Blueberry Biscuit – Button #6
- 2 Iced Blueberry Biscuits – Button #7
Serving
Single
- Dine-In: 3lb food tray place on tray with 1 fork.
- Dine-Out: 3 lb. food tray with a fork and 2 napkins in a 6lb bag
Double
- Dine-In: 3 lb. food tray place on tray with 1 fork.
- Dine-Out: 3 lb. food tray with a fork and 2 napkins in a 6lb bag
1/2 Dozen
- Microwave 3 biscuits at a time using Button #8.
- Place all 6 biscuits into a Family Box.
- Serve with 6 forks and 6 napkins in a t-shirt bag.
Close
- Discard expired product.
- Clean and sanitize all equipment.